1. Recap of the app so far
Before we start, it is good to have an overview of where we stand so far:
-
We created a class called
Form1, this is the screen of the app. -
In it, we have created a special method called
Form1(same name as the class). This method will execute when the screen is instantiated -
In this method, we have created variables for our images.
-
We have also created containers and given them a layout. Our screen is organized in three regions.
-
We have created Labels, ScaleImageButton and MultiButtons and added them to the screen.
-
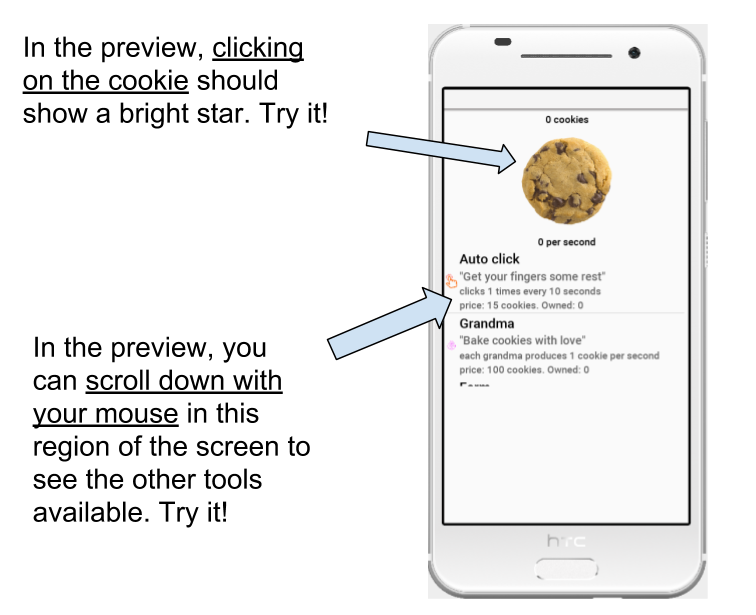
The interface is ready, it should look like:

If you are lost or unsure about the code you have written so far, here is a file with the complete code. You should of course place it in a file named Form1 (to create this file, follow these instructions).
Now we need that the app "do something" when the player clicks on different parts of the screen. This is what we are going to write now.
2. Increasing the score when the cookie is clicked
First, we need a variable to store the value of the score. We will put this variable near the top of our file:
package net.clementlevallois.net.cookieclicker.ultimate;

public class Form1 extends com.codename1.ui.Form {

  Resources theme = Resources.getGlobalResources();
  float score = 0f; (1)

}| 1 | we create a new variable. The f after the zero is to indicate the number is a decimal, see this lesson. |
Then we add lines of code in the constructor method public Form1 () { where we have written everything so far:
centerRegion.add(autoclickButton); (1)
centerRegion.add(grandmaButton); (1)
centerRegion.add(farmButton); (1)

cookieCentral.addActionListener(  (2)
                (event) -> { }  (3)
); (4)| 1 | The last lines we have written in the previous lesson, for reference. |
| 2 | we use the method addActionListener for the variable cookieCentral (which is the picture of our cookie). |
| 3 | Anything written between the curly braces { } will be executed when the user touches the cookie on sreen! |
| 4 | this parenthesis closes the addActionListener method, and the ; ends the line. |
The lines of code above are typically hard to understand the first time, because there are brackets, curly braces and semicolons to put at the right place.
You don’t need to memorize everything but should still take some time to understand the logic, instead of copying this code without thoughts.
These lines of code do nothing yet, because we haven’t written anything between the curly braces in the line (event) → { }.
Let’s had lines of code which will increase the score by one (+ 1) when the player hits the cookie:
The lines will be:
score = score + 1;
scoreLabel.setText(score + " cookies");
And they should be placed between the curly braces. What they do is simple:
score = score + 1;
→ the variable score gets incremented by one
scoreLabel.setText(score + " cookies");
→ the text of the Label showing the score on screen gets updated and will show the score followed by the word "cookies".
Let’s place these 2 lines where they should be:
| 1 | don’t forget the opening and closing curly braces! |
| 2 | don’t forget to close the parenthesis and the semicolon ; !
Now, when the user will touch / press the picture of the cookie, the score will increase by one and this new score will be visible on screen: |
Congratulations, your app has started coming alive! 🎉
In the next lesson, we will learn how to make the other buttons of the app "do something" when the player clicks on them.
The end
Questions? Want to open a discussion on this lesson? Visit the forum here (need a free Github account).
Find references for this lesson, and other lessons, here.
Licence: Creative Commons, Attribution 4.0 International (CC BY 4.0). You are free to:
-
copy and redistribute the material in any medium or format
-
Adapt — remix, transform, and build upon the material
⇒ for any purpose, even commercially.
 This course is designed by Clement Levallois.
Discover my other courses in data / tech for business: http://www.clementlevallois.net
Or get in touch via Twitter: @seinecle