// these lines of code should go inside  public Form1() { }
this.addComponent(northRegion);
this.addComponent(centerRegion);
this.addComponent(southRegion); (1)

// creating the cookie central button
ScaleImageButton cookieCentral = new ScaleImageButton(); (2)
cookieCentral.setIcon(cookieCentraPic); (3)
cookieCentral.setBackgroundType(Style.BACKGROUND_IMAGE_SCALED_FIT); (4)
cookieCentral.getPressedStyle().setBgImage(cookiePressedPic); (5)CODAPPS
Filling the layout with content
'Escape' or 'o' to see all sides, F11 for full screen, 's' for speaker notes
you must have worked and understood the content of Module 5 about coding before you can follow this lesson. |
1. Where we left
we have created a Form,
added variables to it,
and create a special method in it: a constructor which will be executed when the Form gets created (
instantiated).
we have put the Form in a GridLayout with three rows and one column.
the first and last rows are in a BorderLayout
the 2nd row is in a GridLayout.
2. Working on the top row
In the top of the screen we want to see the big cookie where the player can click, and 2 scores:
the cookies produced
the rate of cookie production ("cookies per second")
Let’s add these things, by typing the following lines of code just where we left:
Creating the clickable picture of the cookie
| 1 | this is the last line we had written in the previous lesson, for reference |
| 2 | we declare and instantiate a variable of type ScaleImageButton: a picture that can be clicked. |
| 3 | we give it a picture… that we had defined as a variable above! (cookieCentraPic) |
| 4 | the picutre should stretch to fit the available space (you should remember this setting from the GUI Builder) |
| 5 | When pressed, the button changes its picture. |
Creating the Label showing the score
// these lines of code should go inside  public Form1() { }
Label scoreLabel = new Label();
scoreLabel.setText("0 cookies");
scoreLabel.getStyle().setAlignment(Component.CENTER); //centering the text
Creating the Label showing the cookies produced per second
// these lines of code should go inside  public Form1() { }
Label cookiesPerSecondLabel = new Label();
cookiesPerSecondLabel.setText("0 per second");
cookiesPerSecondLabel.getStyle().setAlignment(Component.CENTER); //centering the text
Adding what we just created to the Container in the top row
// these lines of code should go inside  public Form1() { }
northRegion.add(BorderLayout.NORTH, scoreLabel);(1)
northRegion.add(BorderLayout.CENTER, cookieCentral);(1)
northRegion.add(BorderLayout.SOUTH, cookiesPerSecondLabel);(1)| 1 | We have seen this this logic in the GUI Builder: when the Container is in a BorderLayout, the components you add to it need to be set in North, West, South, East or Center positions. |
Good! We have finished the top row. If you launch the preview, your app should look like this:
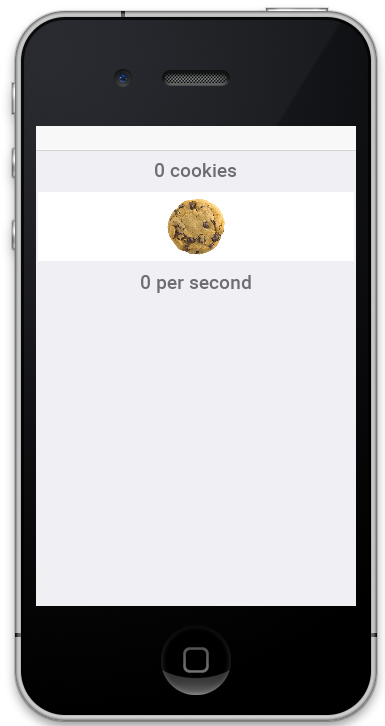
Figure 1. The app with the top row designed
3. Working on the middle row
The middle row of the app will receive the tools that the player can buy to speed up the cookie production.
This is where plenty of creativity can take place. Here we will create just tools:
the autoclicker: when you buy it, it clicks automatically once every 10 seconds
the grandma: she bakes cookies (one per second)
the farm: you cultivate cookies at the rate of three per second.
Each of these items can be purchased multiple times: their productivity grows, but their price as well!
Let’s create them in the app, right after the last lines of code we have written:
Creating the autoclick tool
// these lines of code should go inside  public Form1() { }
MultiButton autoclickButton = new MultiButton("Auto click"); (1)
autoclickButton.setIcon(clickPic);(2)
autoclickButton.setTextLine2("\"Get your fingers some rest\""); (3)
autoclickButton.setTextLine3("clicks 1 times every 10 seconds");
autoclickButton.setTextLine4("price: 15 cookies. Owned: 0");| 1 | The MultiButton is a Component not available in the GUIBuilder, so we discover it here. Very useful for us here. |
| 2 | We had imported the picture in theme.res and created a variable clickPic from it |
| 3 | Why this strange \" sign on this line? Since the " character is used in code to enclose text, what if you need this character in the text itself? You need to add a \ just before. |
Creating grandmas
// these lines of code should go inside  public Form1() { }
MultiButton grandmaButton = new MultiButton("Grandma");
grandmaButton.setIcon(grandmaPic); (2)
grandmaButton.setTextLine2("\"Bake cookies with love\"");
grandmaButton.setTextLine3("each grandma produces 1 cookie per second");
grandmaButton.setTextLine4("price: 100 cookies. Owned: 0");| 1 | We had imported the picture in theme.res and created a variable grandmaPic from it |
Creating farms
// these lines of code should go inside  public Form1() { }
//The farm
MultiButton farmButton = new MultiButton("Farm");
farmButton.setIcon(farmPic);
farmButton.setTextLine2("\"Harvest cookies every summer!\"");
farmButton.setTextLine3("each farm produces 3 cookies per second");
farmButton.setTextLine4("price: 500 cookies. Owned: 0");
Finally, we need to add these three items to the Container centerRegion which is in the 2nd row of the screen:
Adding these 3 items to the middle row
// these lines of code should go inside  public Form1() { }
centerRegion.add(autoclickButton);
centerRegion.add(grandmaButton);
centerRegion.add(farmButton);
Launch the preview: your app should now look about like this (except for the color and a few details).
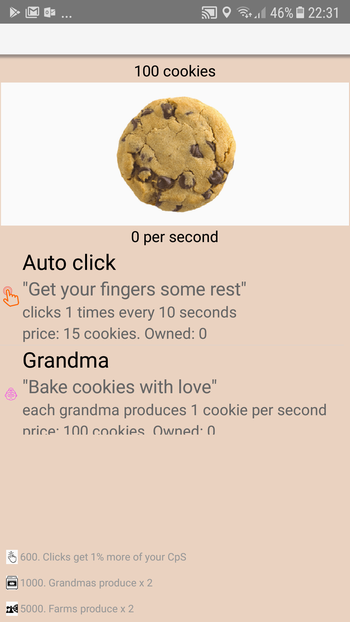
Figure 2. The Cookie Cliker design
Notice that the cookie can be clicked, and the panel for tools is scrollable vertically.
Your app is now correctly designed, congrats! Yet, the "logic" of the app is still missing! This will be for our last module.
If you need the entire code we have written in Form1.java so far, you can download it here.
The end
Questions? Want to open a discussion on this lesson? Visit the forum here (need a free Github account).
Find references for this lesson, and other lessons, here.
Licence: Creative Commons, Attribution 4.0 International (CC BY 4.0). You are free to:
copy and redistribute the material in any medium or format
Adapt — remix, transform, and build upon the material
⇒ for any purpose, even commercially.
 This course is designed by Clement Levallois.
Discover my other courses in data / tech for business: http://www.clementlevallois.net
Or get in touch via Twitter: @seinecle